How to change fonts in my PopUp
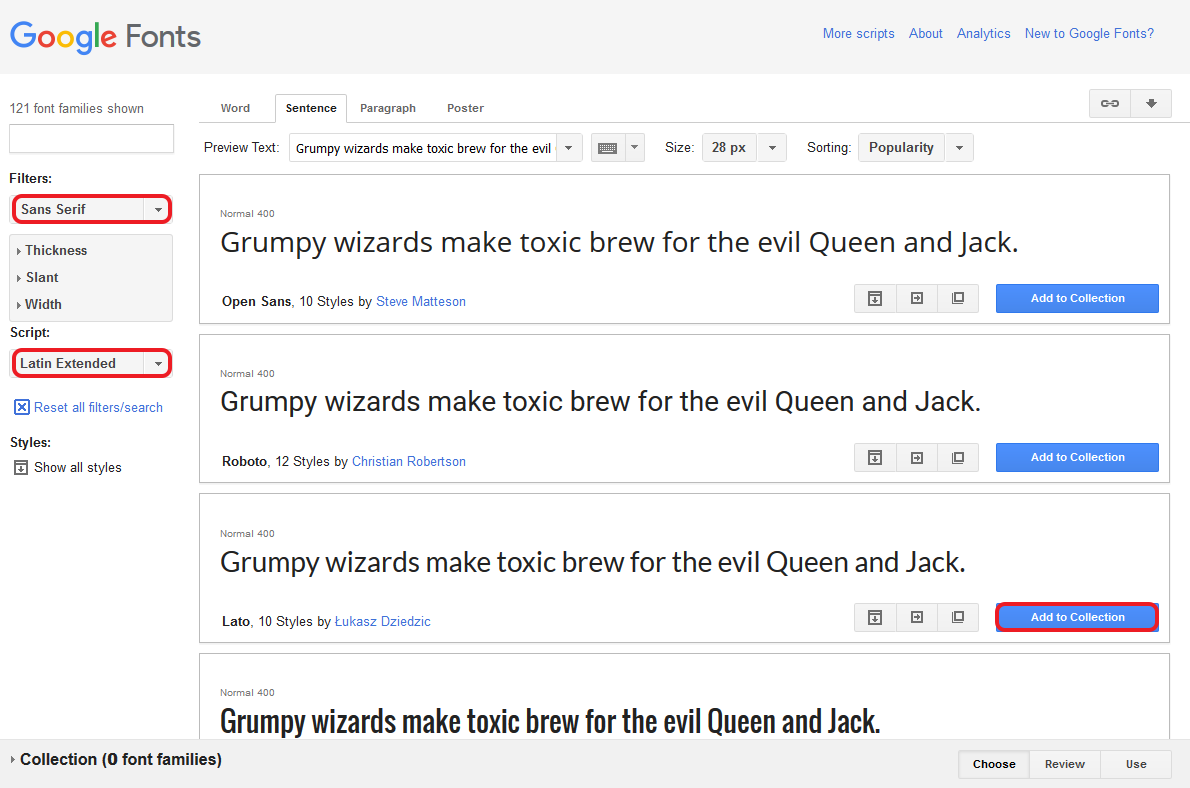
1. Let’s start with finding more appropriate font – go to Google Fonts page. If you use English in your popup, you have nothing to worry about. For most of other languages with Latin alphabet you’ll have to use Latin Extended, I also want Sans Serif font, let’s use the filtering. I like Lato, let’s use this font – click Add to Collection:
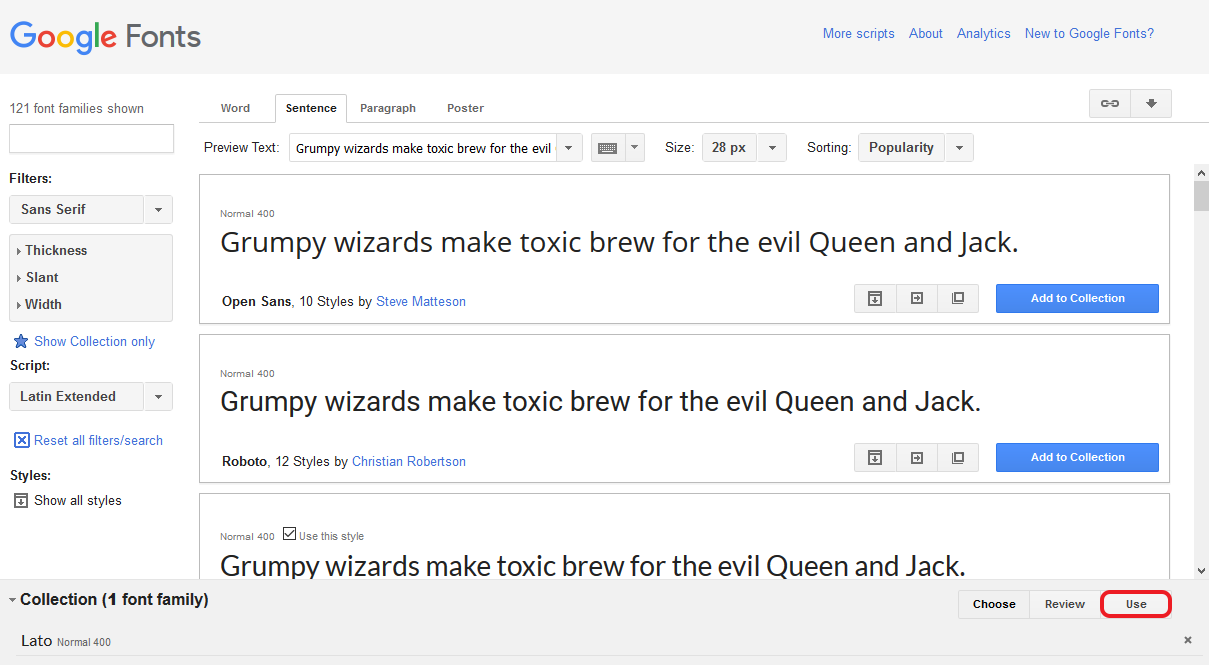
2. Let’s use this Font (you can choose more then one at a time):
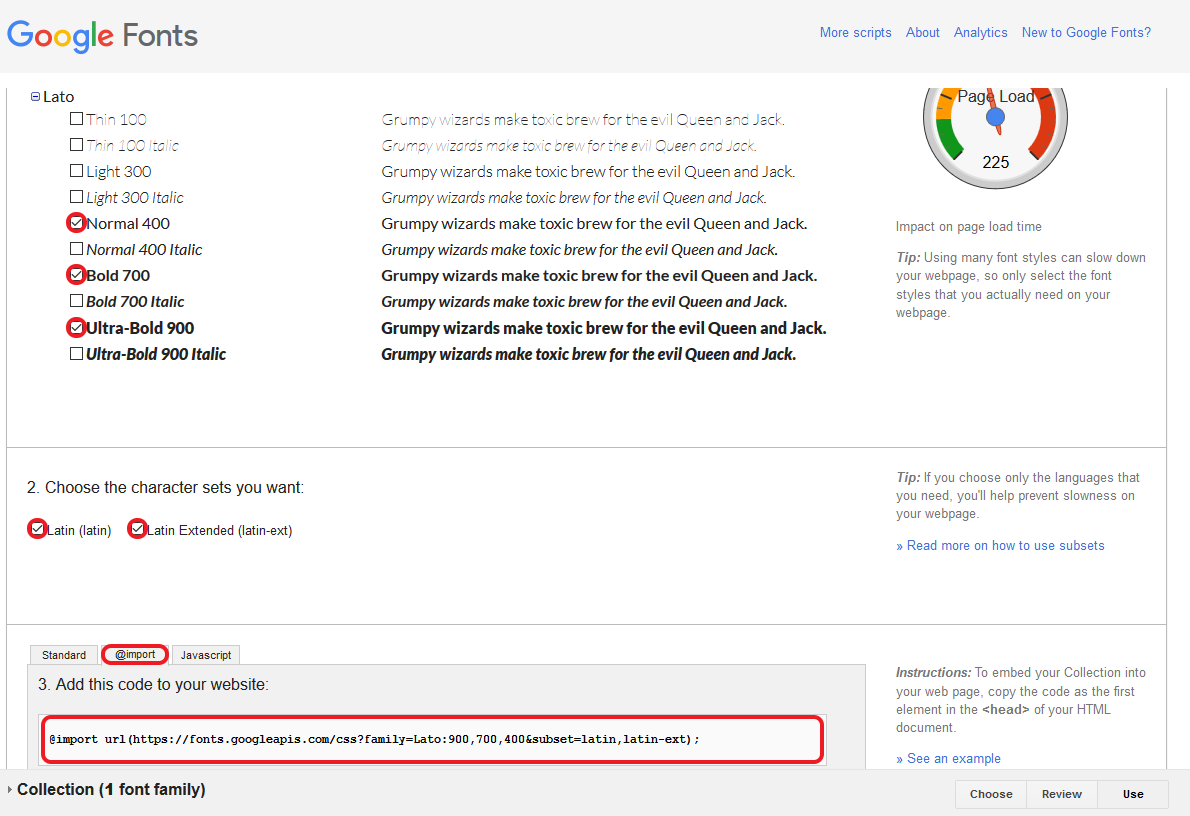
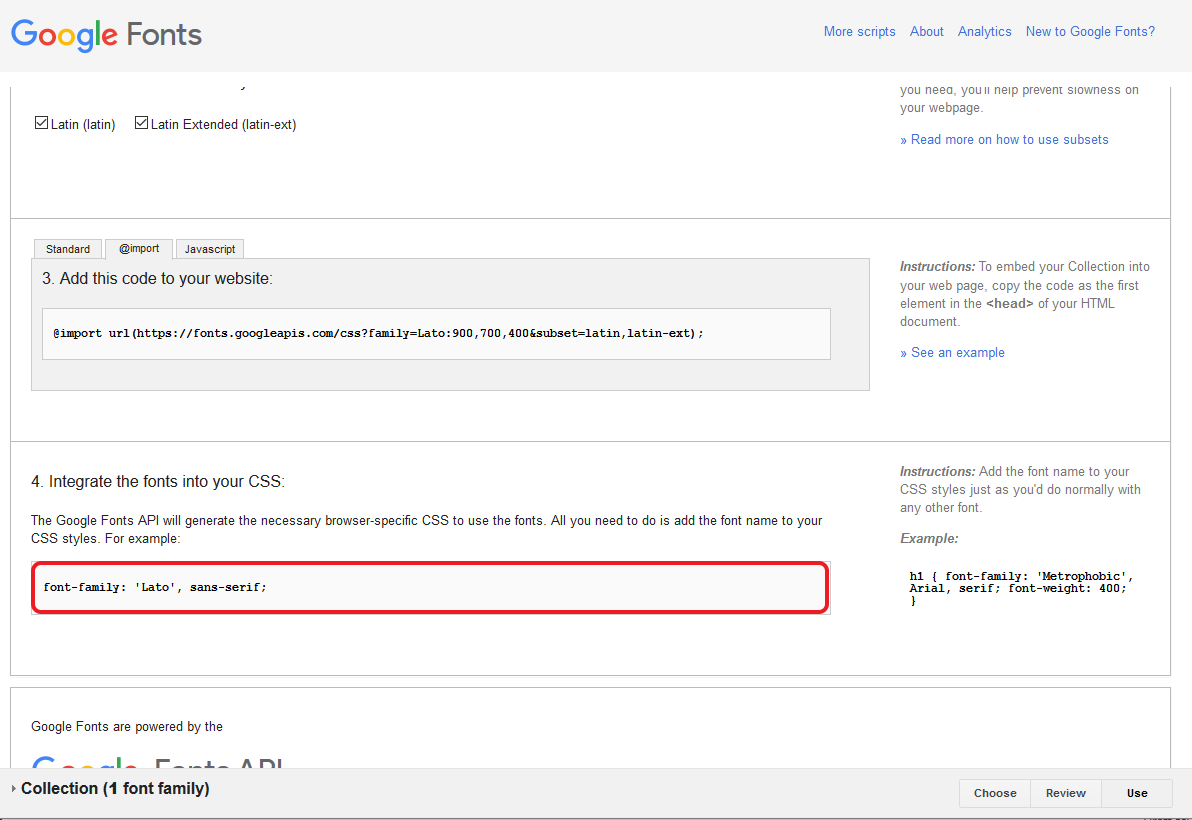
3. We have to choose what font styles we’ll need. It will be Normal 400, Bold 700 and Ultra-Bold 900 for me and I’ll need both Latin and Latin Extended fonts. When everything’s selected click @import tab and copy code:
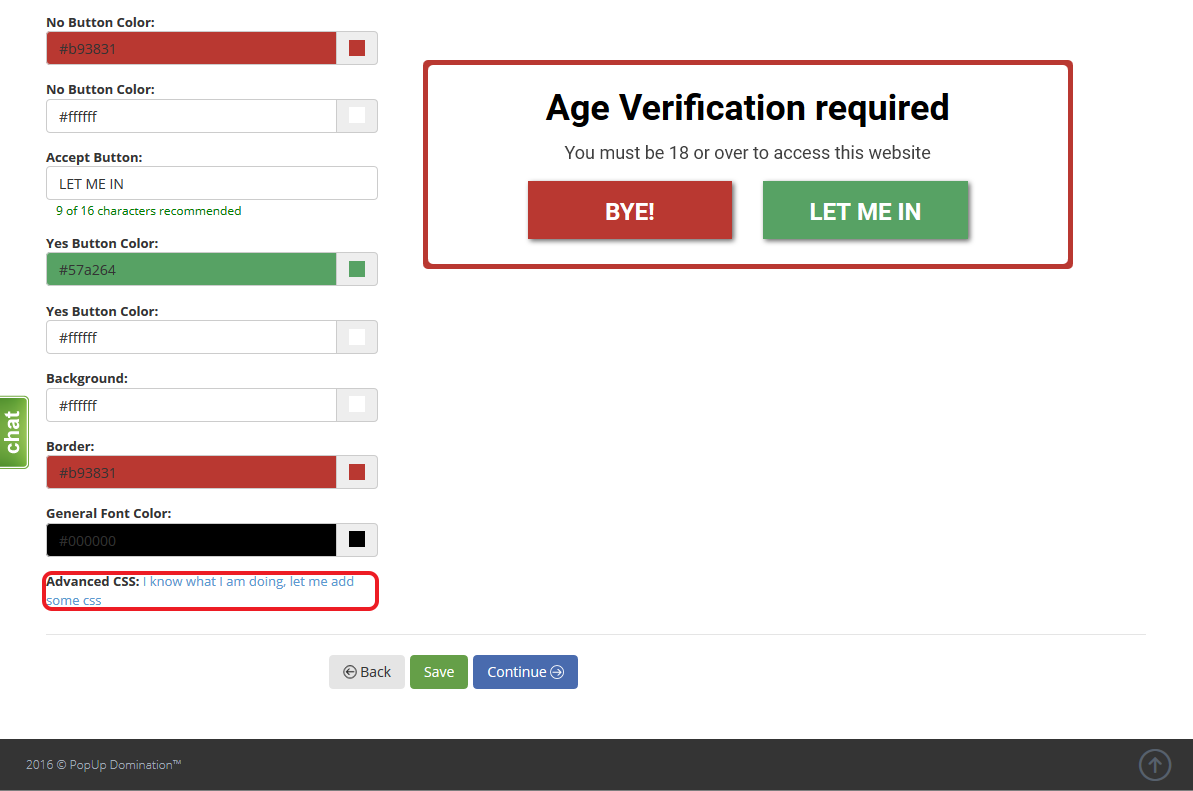
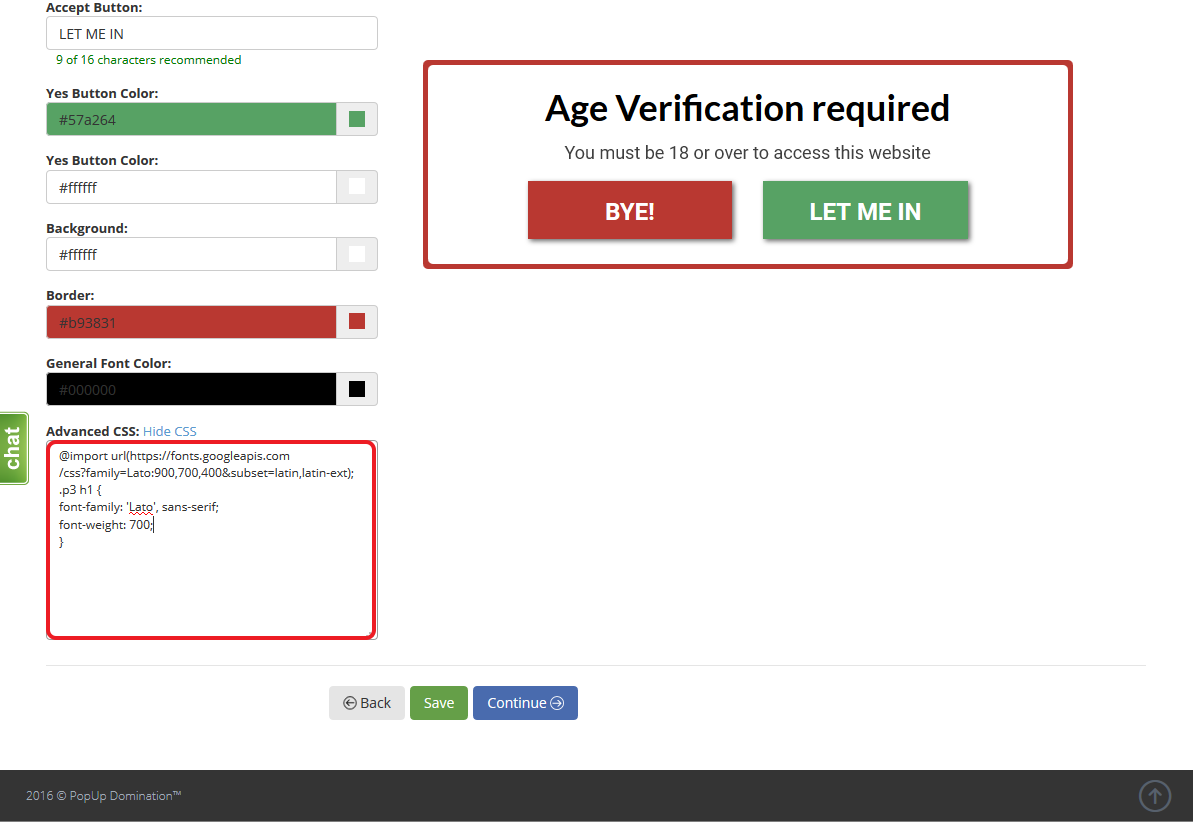
4. On PopUp Wizard Step 2 click on I know what I am doing, let me add some css notification and open Advanced CSS input field:
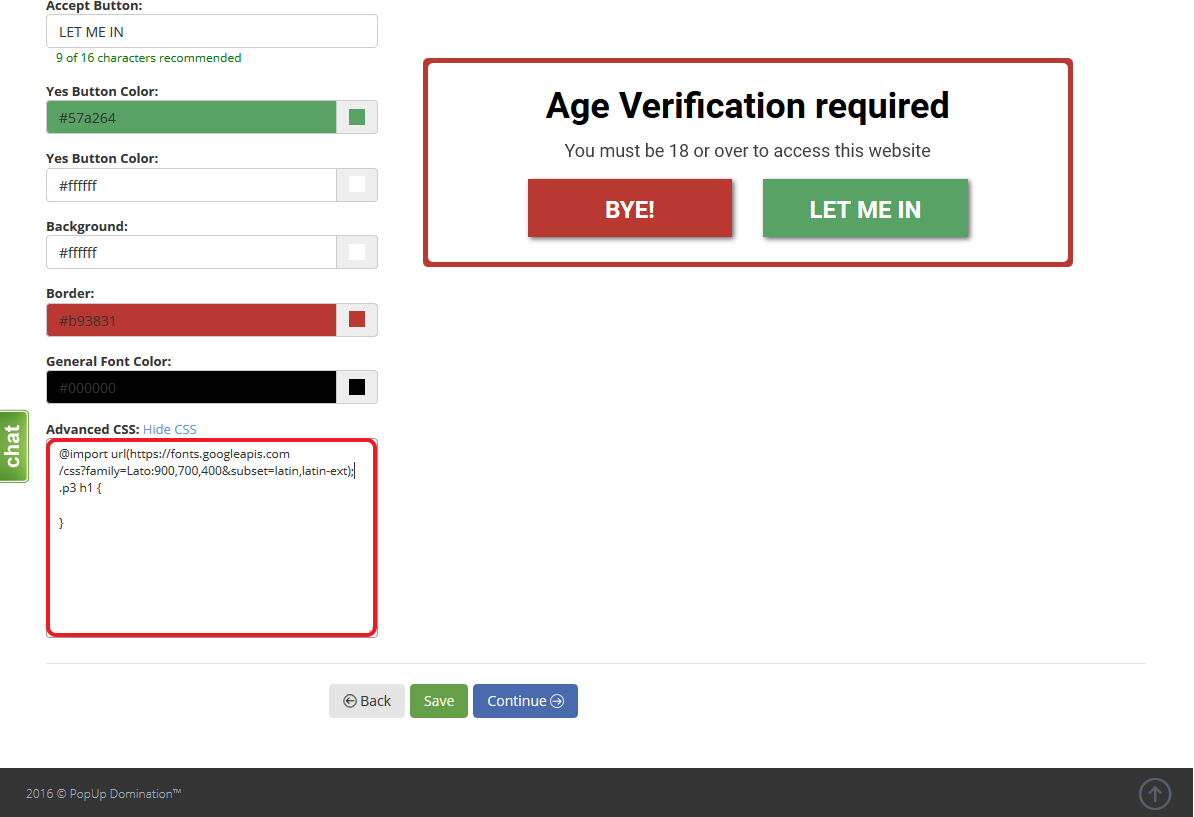
4. Paste code from Google Fonts:

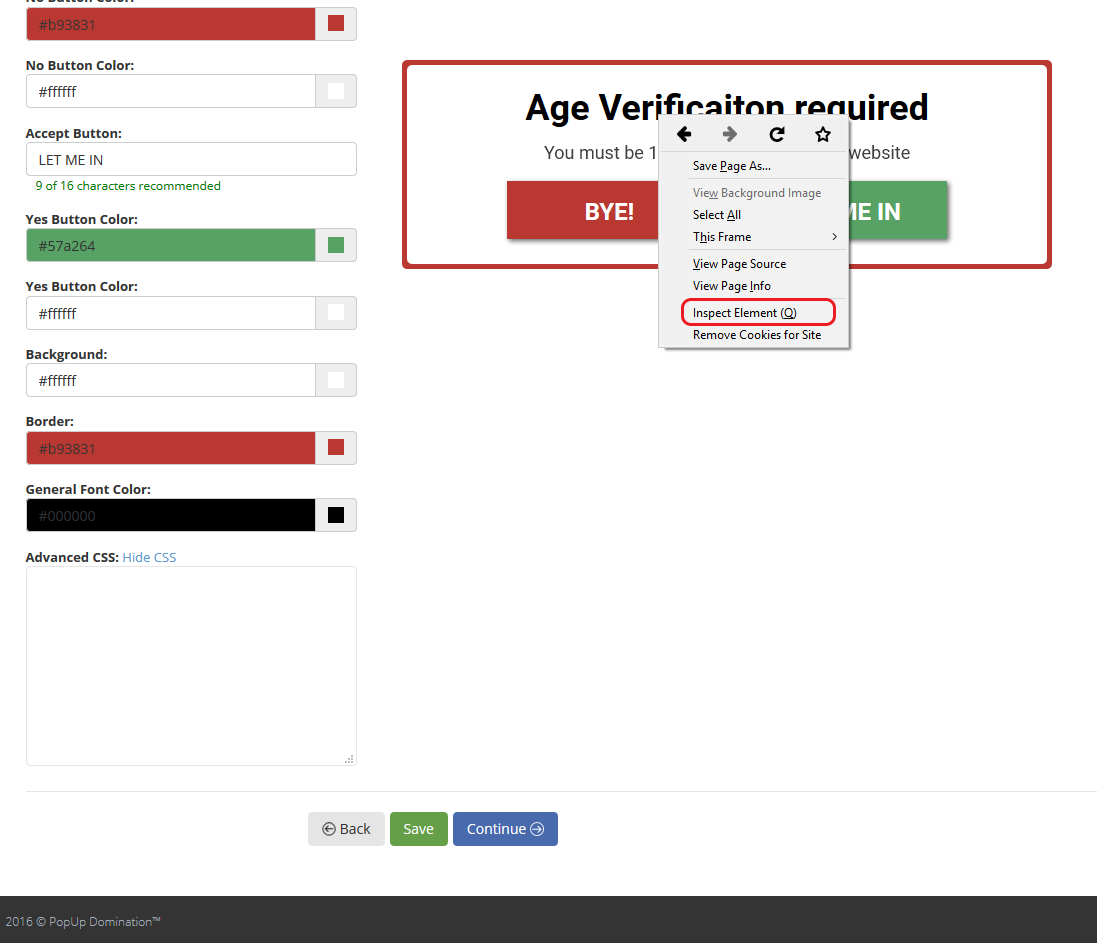
5. Now we have to find the Text blocks selector name. Right click on text you want to change, Inspect Element (Inspect on Chrome):
6. We see that Class name in our case is .p3 h1:
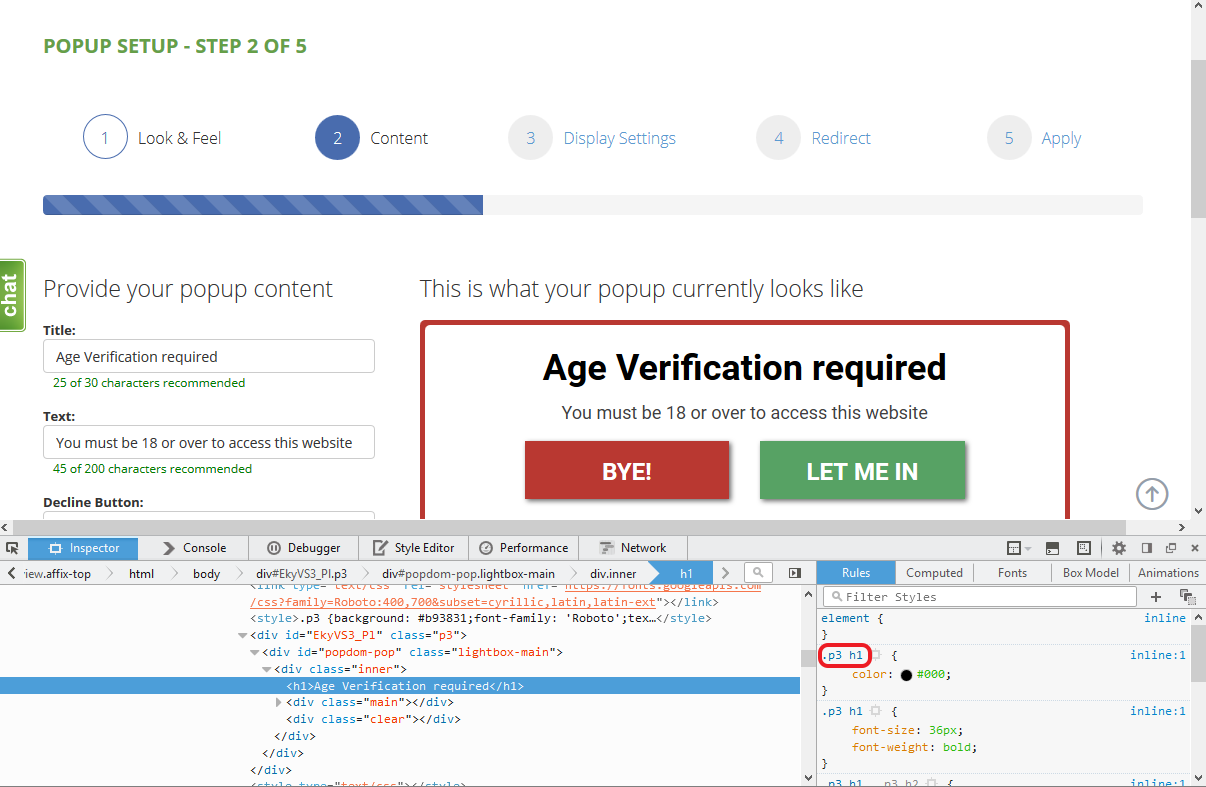
7. We already know our Class name, so we are ready start to write the code: .p3 h1 { }
8. Now let’s return back to Google Fonts page and copy fonts CSS code:
9. Now paste it into our code and add another line, I want my font weight 700, so I type font-weight: 700; and that’s it, we changed the Font of Heading. We can save our PopUp now or make some more changes to CSS.
What else text properties can we change using CSS?
Normally we would define our font-size in px (pixels) of % (percent or parent element’s font size), however there are much more options:
-
medium – (default) sets the font-size to a medium size;
-
xx-small – sets the font-size to an xx-small size;
-
x-small – sets the font-size to an extra small size;
-
small – sets the font-size to a small size;
-
large – sets the font-size to a large size;
-
x-large – sets the font-size to an extra large size;
-
xx-large – sets the font-size to an xx-large size;
-
smaller – sets the font-size to a smaller size than the parent element;
-
larger – sets the font-size to a larger size than the parent element.
In our example we will make text large: .p3 h {font-size: large;}
There are three possible values of font-style:
-
normal (default);
-
italic;
-
oblique.
We’ll make our heading oblique: .p3 h {font-style: oblique;}
font-variant has only two values – default normal and small-caps. Let’s try this: .p3 h {font-variant: small-caps;}
We already used this property, but there are more values here:
-
normal (default);
-
bold;
-
bolder;
-
lighter;
-
number values from 100 – 900, where 400 is the same as normal and 700 is the same as bold, we used 700 already.
We had .p3 h {font-weight: 700;}
Ok, you can change font color in app, but sometimes you might want to do it with CSS.
There are three ways, how you can tell the color:
-
color: red; (using color name);
-
color: #ff0000 or color: f00; (using hex color code);
-
color: rgb(255,0,0); (using RGB color code).
In our example if we want to get red heading it would look like .p3 h {color: #f00;}
You can change text direction using property direction: .p3 h {direction: rtl;}
Letter spacing can be defined by adding pixels between letter for bigger spaces and subtracting to get letters tighter together: .p3 h {letter-spacing: -1px;}
In our example it’s not necessary, but if you have two or more lines, you would probably like to make space between lines bigger or smaller.
line-height can be defined in three ways:
-
line-height: 110%; (line height in percent of the current font size);
-
line-height: 1.5; (a number that will be multiplied with the current font size to set the line height);
-
line-height: 15px; (a fixed line height in px).
Here’s how it looks like in our example: .p3 h {line-height: 120%;}
There are four values for text-align – left, right, center, justify. In our case let it be .p3 h {text-align: justify;}
We can set underline, overline or line-trough to our text: .p3 h {text-decoration: overline;}
You can set text-indent in px (fixed indentation in pixels) or % (indentation in % of the width of the parent element). We don’t need indentation since it’s heading we are making changes to, but let’s make it small .p3 h {text-indent: 10px;}
To set shadow we have to define 1) horizontal shadow (necessary), 2) vertical shadow (necessary), 3) blur-radius (optional, 0 by default) and 4) color (optional, color options are the same as for color property we discussed before). Complete look will be little more complicated – .p3 h {text-shadow: 3px 2px 10px #FF0000;}
There are three values for text-transform:
-
capitalize – transforms the first character of each word to uppercase;
-
uppercase – transforms all characters to uppercase;
-
lowercase – transforms all characters to lowercase;
Let’s make our heading uppercase: .p3 h {text-transform: uppercase;}
You can specify word-spacing in px (pixels). Let’s say: .p3 h {word-spacing: 30px;}
Now, let’s try to put this all together in one code and see what will we get:
.p3 h {
font-family: ‘Lato’, sans-serif;
font-size: large;
font-style: oblique;
font-variant: small-caps;
font-weight: 700;
color: #f00;
direction: rtl;
letter-spacing: -1px;
line-height: 120%;
text-align: justify;
text-decoration: overline;
text-indent: 10px;
text-shadow: 3px 2px 10px #FF0000;
text-transform: uppercase;
word-spacing: 30px;
}
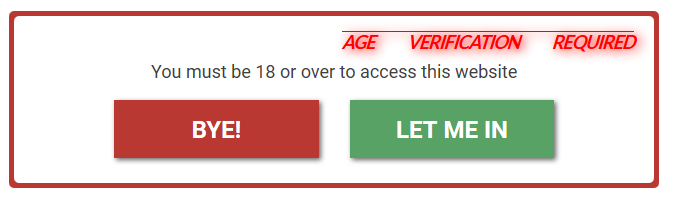
Crazy: